You can enter the IP address of the DeviceMaster in your web browser or
access the web page from PortVision DX by highlighting the DeviceMaster in the Device List pane and
clicking the WebPage button.
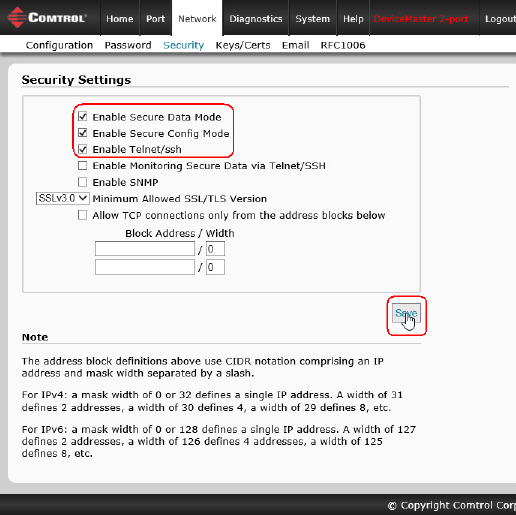
Click Network | Security.
Click Enable Secure Data Mode so that TCP connections that carry
data to/from the serial ports are encrypted using SSL or TLS security protocols.
If this is enabled the following DeviceMaster features are disabled:
The Pepperl+Fuchs Comtrol, Inc. proprietary MAC mode Ethernet driver protocol used in NS-Link
and both UDP and MAC mode serial data transport
The e-mail feature in SocketServer
The RFC1006 features in SocketServer
Click Enable Secure Config Mode if you want to prevent
unencrypted access to administrative and diagnostic functions in the DeviceMaster.
If this is enabled the following DeviceMaster features are disabled:
Telnet access to administrative and diagnostic functions is disabled. SSH access is still allowed.
Unencrypted access to the web server via port 80 (http:// URLs) is disabled.
Encrypted access to the web server via port 443 (https:// URLs) is still allowed.
Administrative commands that change configuration or operating state
which are received using the Pepperl+Fuchs Comtrol, Inc. proprietary TCP driver protocol on TCP port 4606 are ignored.
Administrative commands that change configuration or operating state that are
received using the Pepperl+Fuchs Comtrol, Inc. MAC mode proprietary Ethernet protocol number 0x11FE are ignored.
If necessary, click Enable Telnet/ssh.
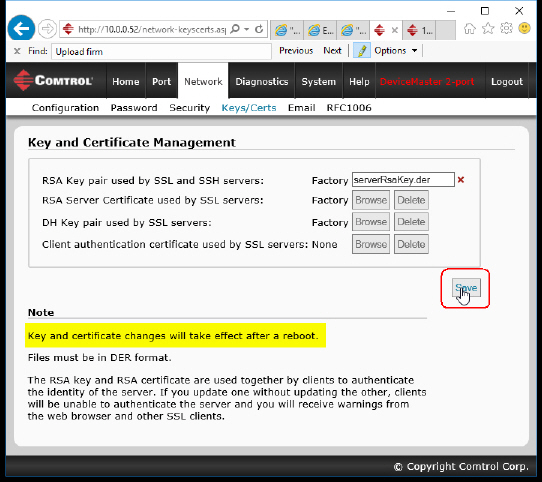
If desired, configure security keys and certificates by clicking the Keys/Certs link.
If required, configure
RSA key pair used by SSL and SSH servers.
This is used to sign the Server RSA Certificate in order to verify that the
DeviceMaster is authorized to use the server RSA identity certificate. Possession of the private
portion of this key pair allows somebody to pose as the DeviceMaster If the Server RSA Key is to be replaced, a corresponding RSA identity certificate
must also be generated and uploaded or clients are not able to verify the identity certificate.
Click Browse to locate the server RSA key.
Click Save when you are done.
If required, configure the RSA identity certificate
that the DeviceMaster uses during SSL/TLS handshaking to identify itself.
It is used most frequently by SSL server code in the DeviceMaster when clients open connections to the
DeviceMaster's secure web server or other secure TCP ports. If a DeviceMaster serial port
configuration is set up to open (as a client) a TCP connection to another server device,
the DeviceMaster also uses this certificate to identify itself as an SSL client if requested by the server.
In order to function properly, this certificate must be signed using the Server RSA Key.
This means that the server RSA certificate and server RSA key must be replaced as a pair.
Click Browse to locate the RSA server certificate.
Click Save when you are done.
If required, configure the private/public key
pair that is used by some cipher suites to encrypt the SSL/TLS handshaking messages.
Possession of the private portion of the key pair allows an eavesdropper to decrypt traffic on SSL/TLS
connections that use DH encryption during handshaking.
If required, upload the
Client Authentication Certificate.
If a CA certificate is uploaded, the DeviceMaster only allows SSL/TLS connections from client
applications that provide to the DeviceMaster an identity certificate that has been signed by the
CA certificate that was uploaded to the DeviceMaster.
This uploaded CA certificate that is used to validate a client's identity is sometimes referred to
as a "trusted root certificate", a "trusted authority certificate", or a "trusted CA certificate".
This CA certificate might be that of a trusted commercial certificate authority or it may be a privately
generated certificate that an organization creates internally to provide a mechanism to control
access to resources that are protected by the SSL/TLS protocols.
To control access to the DeviceMaster's SSL/TLS protected resources you should
create your own custom CA certificate and then configure authorized client applications with
identity certificates signed by the custom CA certificate.
Click Browse to locate the Client Authentication Certificate.
Click Save when you are done.
After completing the key and certification management,
click Save.
Click System | Reboot for the changes to take affect.